Rain drop!
Powered by WPeMatico
this site does not exist

Rain drop!
Powered by WPeMatico
Cris Carter gives his thoughts on Teddy Bridgewater reportedly missing the entire 2017 season. Hear what he had to say during the show with Nick Wright and Kristine Leahy.
Powered by WPeMatico
Super Bowl LI will take place February 5th, and if you are wondering which team to root for, root for the team with a Bruin!The two NFL teams that will be battling for Super Bowl LI have been decided, and with them, thecolleges that get bragging rights for sending the most players to the big game….
Powered by WPeMatico
The Chicago Bulls attempted to halt their public meltdown on Friday and get their season back on track, but from the comments of all those involved, it doesn’t seem like it will be quite so easy.
Powered by WPeMatico
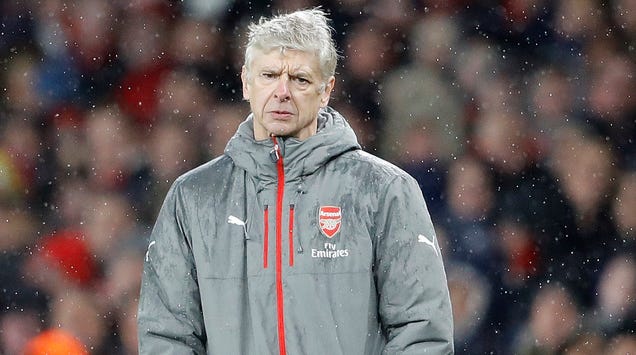
Arsenal will be sans grouchy zipper savant/manager Arsene Wenger for four games, after the English F.A. formally banned him this morning. Wenger was charged with misconduct on Monday for an outburst during last weekend’s win over Burnley.
Powered by WPeMatico
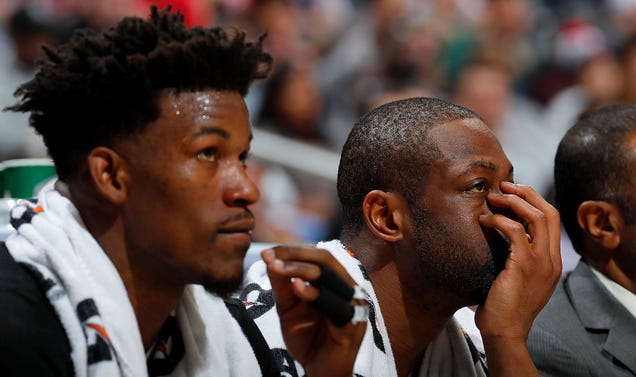
The status of Minnesota Vikings quarterback Teddy Bridgewater is up in the air, but a report on Friday paints a particularly dire picture.The Minnesota Vikings’ 2016 season started to go awry when quarterback Teddy Bridgewater went down with a significant knee injury justbefore Week 1. Genera…
Powered by WPeMatico
LAS VEGAS (AP) The Oakland Raiders are proposing a lease for a new $1.9 billion domed stadium in Las Vegas that would have the team pay $1 a year in rent.
Powered by WPeMatico
HOUSTON (AP) Matchups for the Super Bowl between the Atlanta Falcons (13-5) and New England Patriots (16-2) in Houston:
Powered by WPeMatico
The quarterback’s serious knee injury will reportedly prevent him from playing in another game for the Minnesota Vikings at least until 2018.When Minnesota Vikings quarterback Teddy Bridgewater went down with a severe knee injury last August, the initial diagnosis certainly did not look good…
Powered by WPeMatico
Teddy Bridgewater could reportedly miss the entire 2017 season as he continues recovery from knee surgery.
Powered by WPeMatico
Gordon: San Diego fans ‘on break’ with Chargers
Powered by WPeMatico

Hockey writers and podcasters Dave Lozo of Vice Sports, Sean “Down Goes Brown” McIndoe, and Greg Wyshynski of Puck Daddy have a new book called The 100 Greatest Players In NHL History (And Other Stuff): An Arbitrary Collection of Arbitrary Lists. They give their own ranking of the “NHL 100,” as well as additional…
Powered by WPeMatico

Anker’s kevlar-wrapped PowerLine Lightning cables are some of the most popular we’ve ever posted, and the 10′ model of the even more durable PowerLine+ is marked down to $15 today on Amazon in red, a dollar away from the all-time low.
Powered by WPeMatico
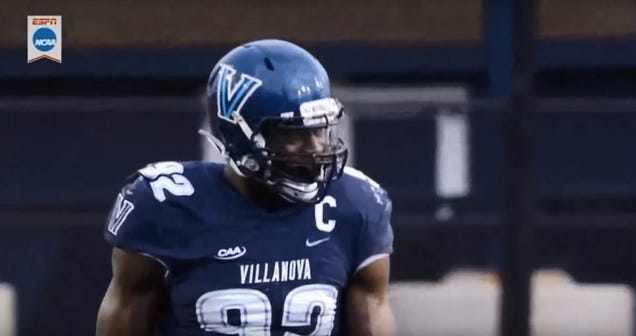
Impress your friends with your knowledge of the existence of this year’s small-school NFL prospect: Tanoh Kpassagnon, a defensive lineman who played at Villanova. Listed at 6-foot-7 and 290 pounds, Kpassagnon went to this week’s Senior Bowl and made at least one NFL executive tumescent. From Philly.com:
Powered by WPeMatico
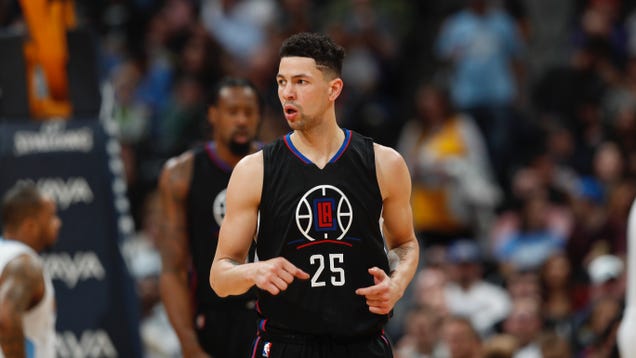
The Los Angeles Clippers are wounded—literally!—and in trouble. Chris Paul’s out for at least five more weeks with an injured thumb; Blake Griffin only just returned from a knee injury that kept him out of 18 games. They’ve lost three of four, and to some real dogs: the Wolves, Nuggets, and 76ers. The Warriors, Spurs,…
Powered by WPeMatico
Both the Patriots and Falcons have terrific running backs, but which group gives their team the Super Bowl 51 edge?As the New England Patriots and Atlanta Falcons prepare for Super Bowl 51, a great deal of the focus has been given to the receiving groups on both teams. While names such as Julio Jo…
Powered by WPeMatico
Is he right?
Powered by WPeMatico
The New England Patriots will be entering Super Bowl 51 with one of the best run defenses in the NFL. Defensive tackle Alan Branch is a big reason why.One of the pleasant surprises for the New England Patriots has been the play of veteran defensive tackle Alan Branch. This season, Branch has emerg…
Powered by WPeMatico
The Oakland Raiders have plenty of money to spend during 2017 NFL Free Agency, but spending it on one of these five big-name players wouldn’t solve any problems.Just as theydid last year, the Oakland Raiders are expected to be significant players during 2017 NFL free agency. They’ll have…
Powered by WPeMatico
NEW YORK (AP) Joe Montana remembers what it was like to start his first Super Bowl.
Powered by WPeMatico

Just because you’re outdoors and/or floating on a body of water doesn’t mean you can’t have something comfortable to sit on. This $29 inflatable blob might stretch the definition of “hammock,” but it certainly beats sitting in the dirt. This particular model includes a water bottle holder and three side pockets.
Powered by WPeMatico
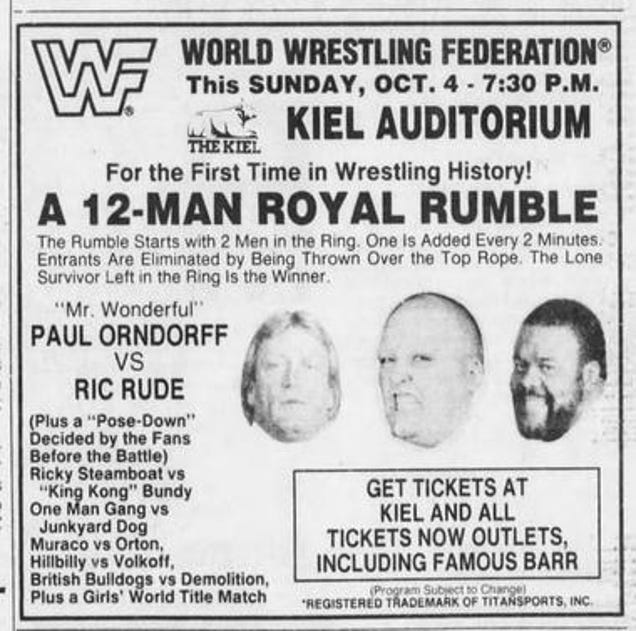
Here’s a fun story on the birth of the Royal Rumble, which started as a house show experiment that didn’t work. [CBS Sports]
Powered by WPeMatico
The evidence that the arrival of a Super Bowl correlates with an increase in sex trafficking ranges from fuzzy to nonexistent.
Powered by WPeMatico
HOUSTON (AP) Malcolm Butler are opening competition before they even meet in the Super Bowl.
Powered by WPeMatico
The Cleveland Browns are still searching for a franchise quarterback, but that player may not need to be found just yet.Every year, the Cleveland Browns deal with the same problem over and over again. The one position they can’t seem to ever get right is being able to find someone who can be…
Powered by WPeMatico
All eyes on No. 82.
Powered by WPeMatico
Branden Albert is a pro-bowl left tackle and a big part of the Miami Dolphins offensive line. Will he be a part of that line in 2017?Omar Kelly of the Sun-Sentinel sat down with general manager Chris Grier and Mike Tannenbaum to talk a little about the play of Jay Ajayi and the offensive line and …
Powered by WPeMatico
It’s really real now, Falcons fans.
Powered by WPeMatico
Who Dat Dish has been doing a free agent profile on each of the position groups on the New Orleans Saints. Today, we wrap up the offensive side of the ball with a look at the Saints offensive line. The line is looked at as the foundation of a smooth running offense, and the New Orleans line rebounde…
Powered by WPeMatico